In this section you can find: (to jump to a section click any of the bullet points)
Adding a Booking
1. Begin by selecting the reservations icon. 
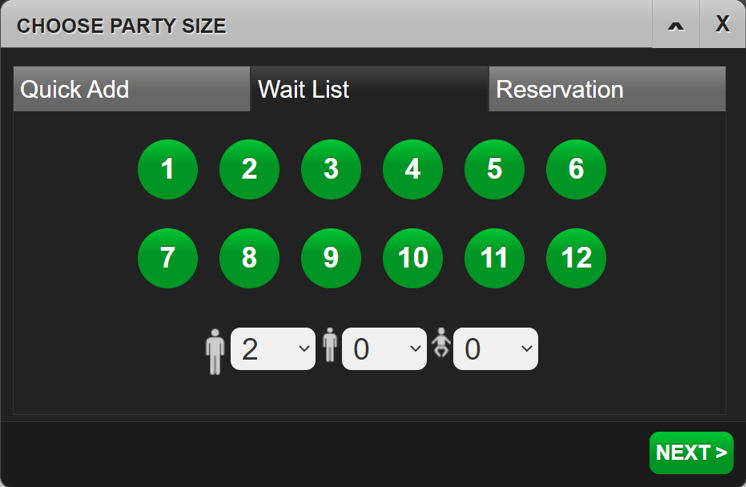
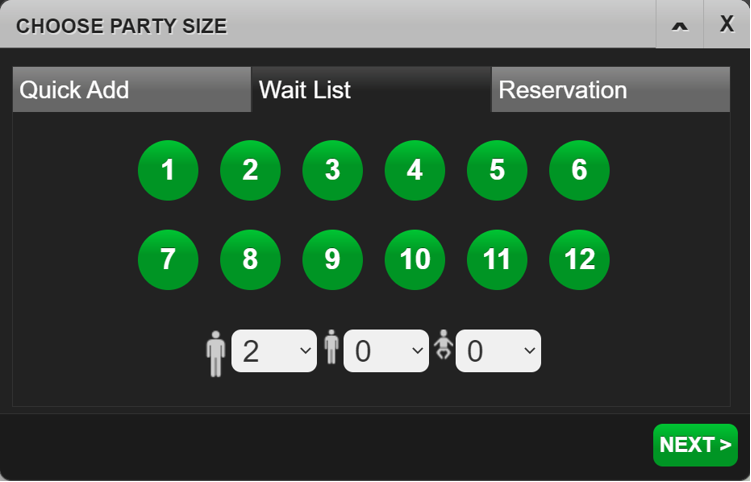
2. The choose party size prompt box is then displayed. Here you will need to select whether you are adding a Quick Add reservation, Waitlist reservation or a regular Reservation. Once the reservation has been selected, select the number of covers the reservation is for. Please note that if a highchair is added, this does not count as a cover.
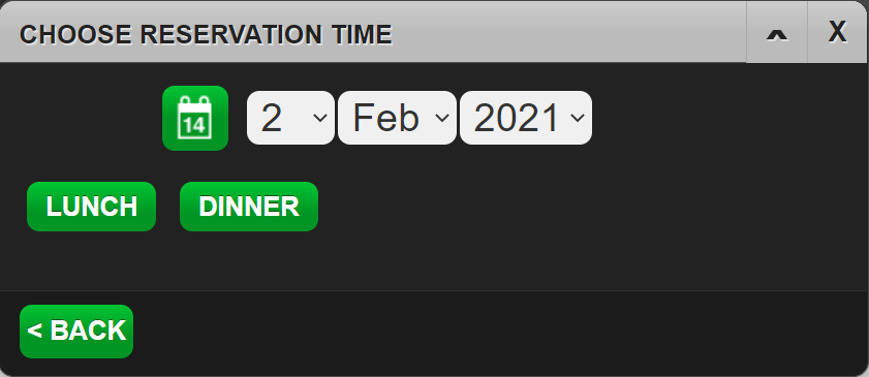
3. We are then asked to select the date and session. Please note that sessions may or may not be setup on your Tables Host app.
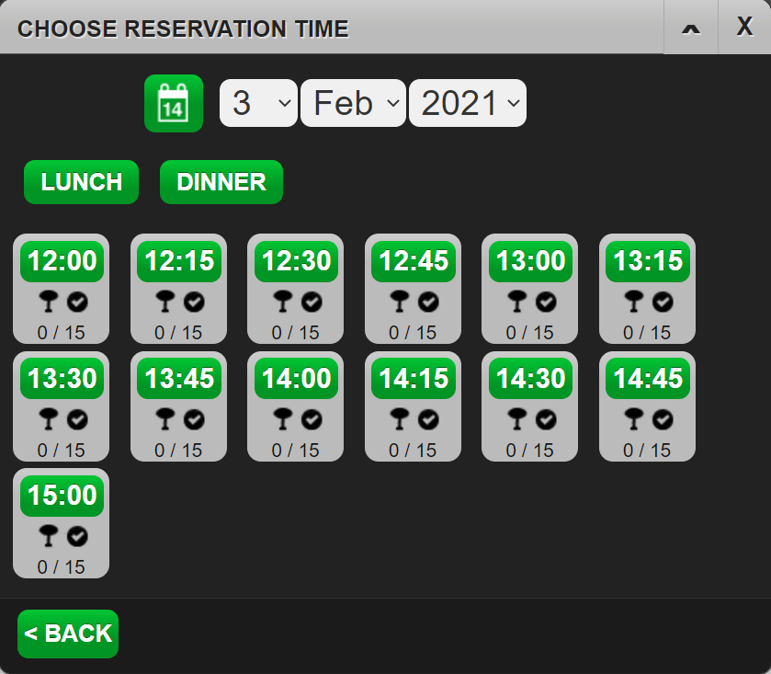
4. A time for the reservation must then be entered. Under each timeslot you can see how many covers are currently booked at any time.
5. The choose adult menu prompt is then displayed. Here you will need to select the menu that the reservation will be dining from.

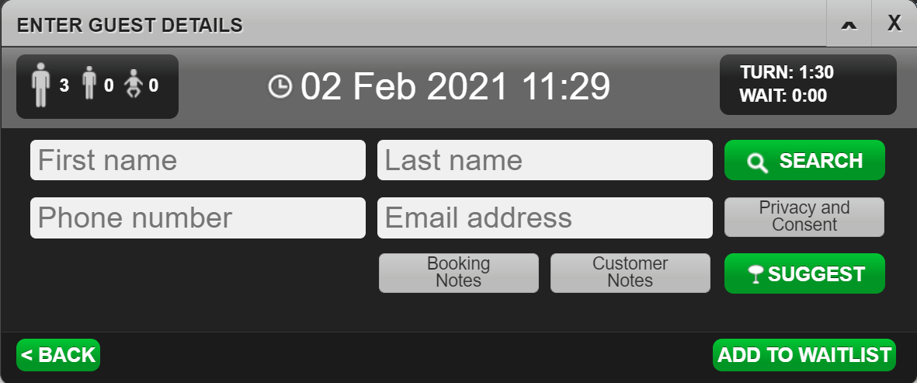
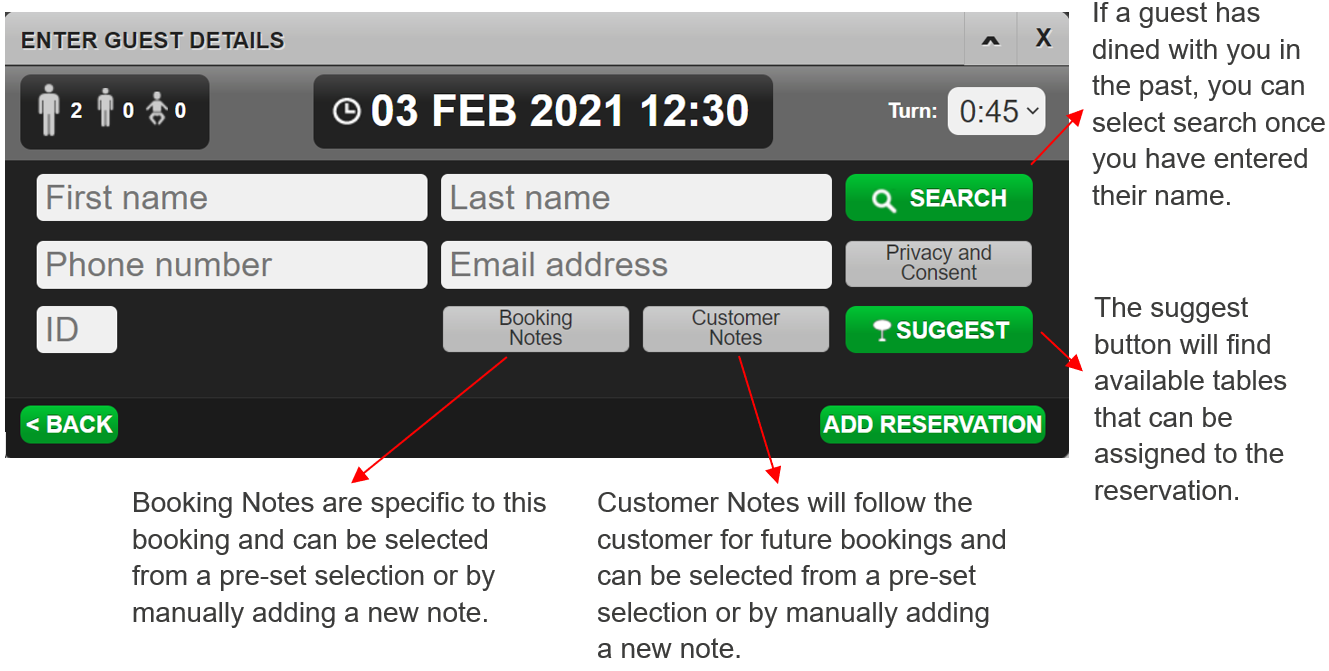
6. Next the guest details need to be added. Once completed, select Add Reservation.
7. Once the reservation has been added, you will be able to view this in the reservations tab.

Editing a Booking
1. Begin this process by selecting the reservation you wish to edit.
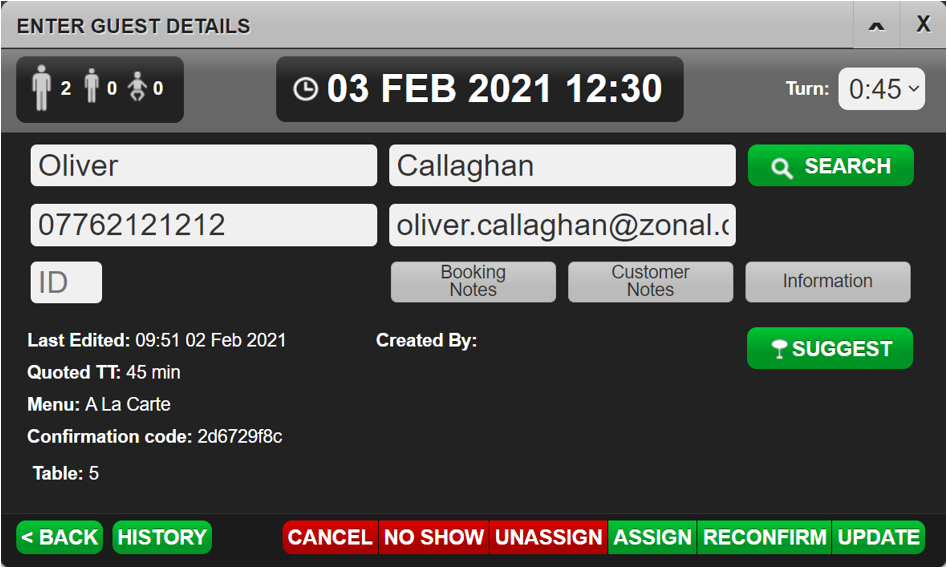
2. If you need to edit the covers for this booking, select the covers icon in the top right corner. If you need to edit the date or time, select the date and time at the top of the box. Once any changes have been made, select Update.
• It is best practice to send a reconfirm email after any changes have been made so the guest has updated confirmation of their reservation.
Cancelling a Booking
1. Begin by finding the reservation you need to cancel and select the trash can icon.

2. Then select cancel. If the booking was a no-show, select the no-show button.

3. The booking has now been cancelled.

Seating a Booking
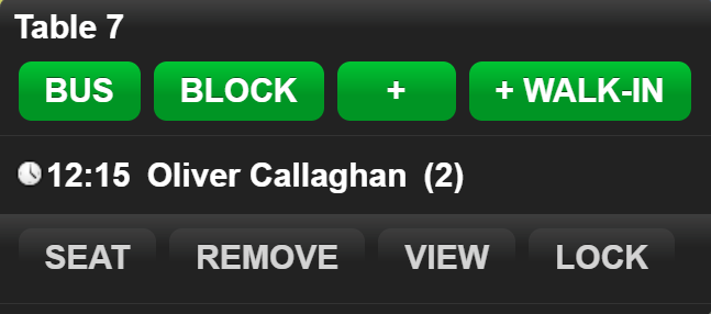
1. Select the reservation you would like to mark as seated. You can do this form the Reservations screen, or from the Table Planning screen.
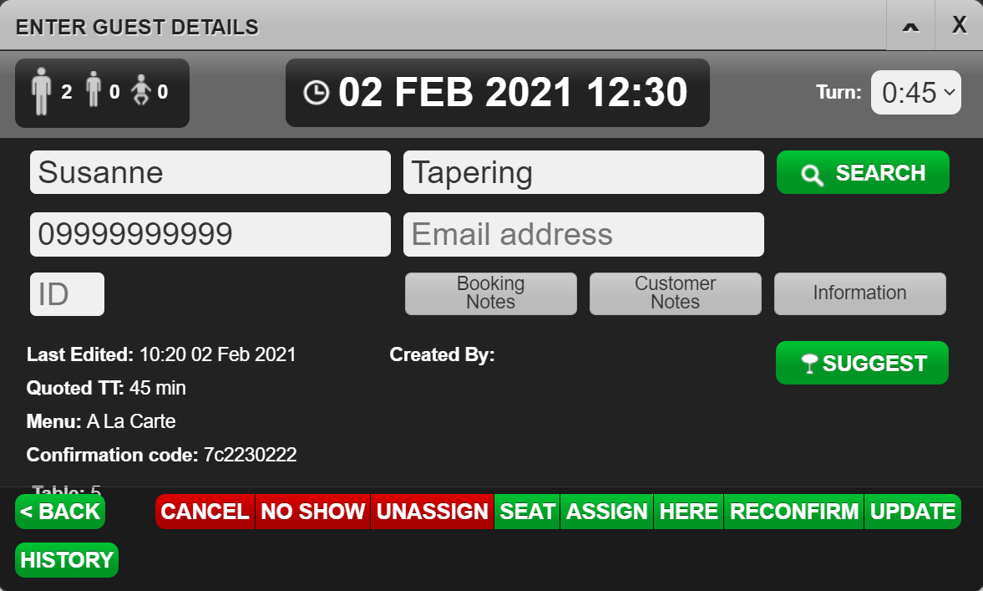
2. Then select the Seat button and the guest will be seated.
Marking a Booking as Here
If a reservation has arrived but is not seated at their table, you can mark the guest as arrived.
1. Select the guest you wish to mark as here and then select Here.

2. Then select where the guest is waiting.
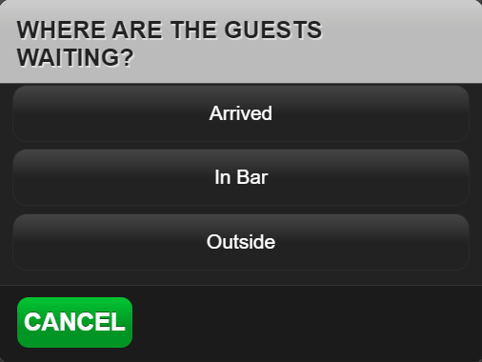
3. The reservation will then be moved into the Arrived column.

Locking a Table to a Booking
1. If the reservation is not assigned to a table then you can drag the reservation and drop it on an available table.
2. Then select the table.
3. Then select the Lock button. A padlock icon will then appear by the reservation.

Seating Guests Across Multiple Tables
1. Open the Table Planning Tab.
2. Select Guest Queue.
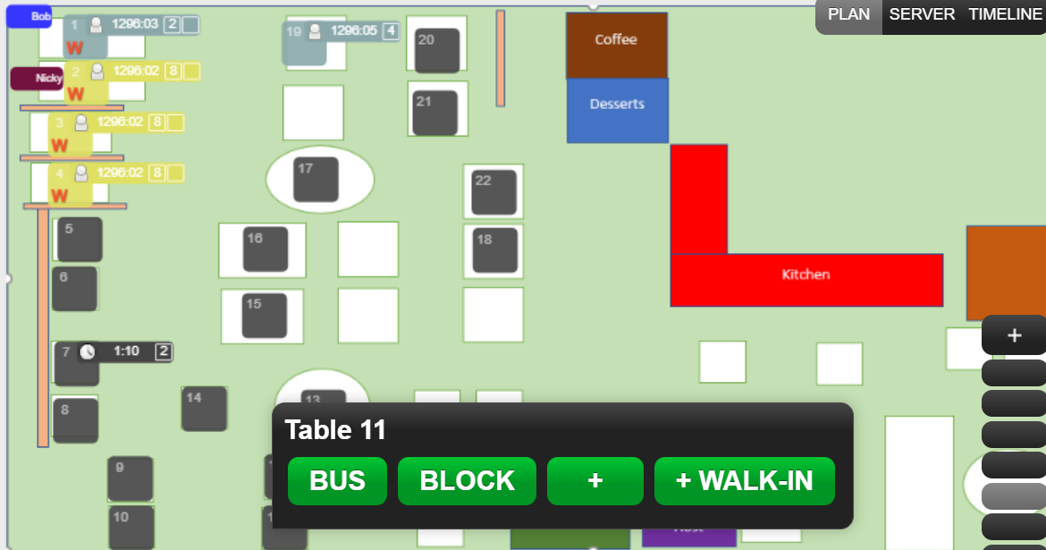
3. Select the Table on the map that you wish to seat the guest on.
4. Select +Walk in.
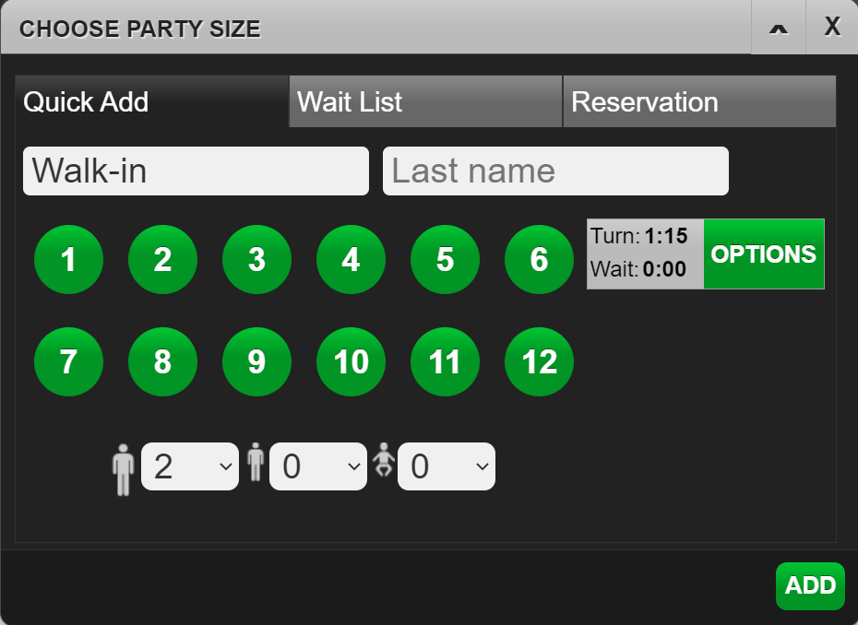
1. Select the number of Adults using the numbered icons and select Add
Or
Select the number of Adults, Children and Highchairs required using the drop-down menus and select Add.
1. Select the tables from the map in the background that you wish to seat the guests across. You can minimise the screen if needed.
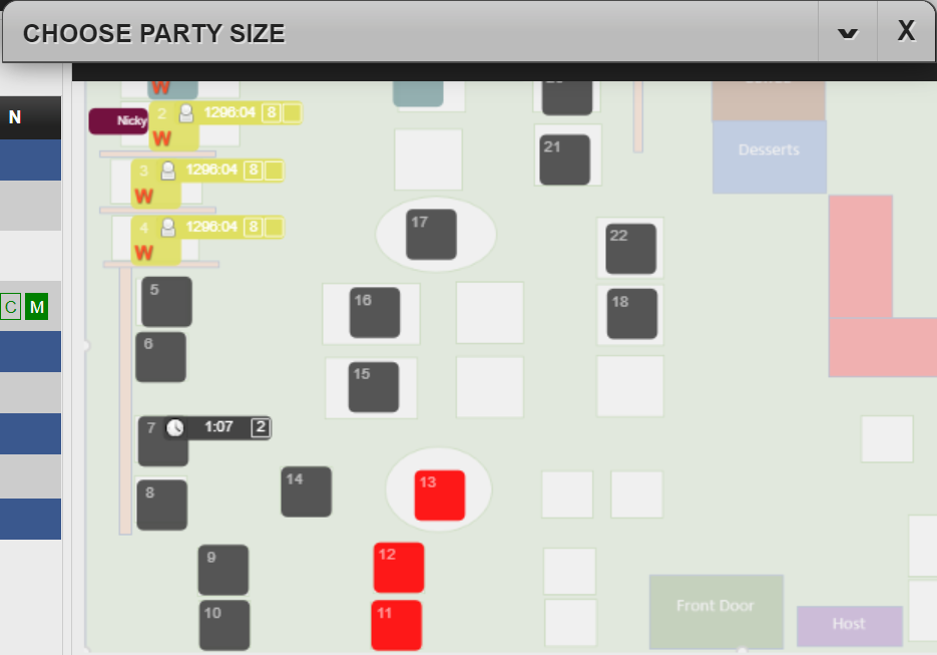
2. Open the Choose Party Size prompt and select Add.
Seating a Walk-in / Quick Add
1. Select a table from the table plan.
2. Then select +Walk-in.
3. Enter the last name and the covers.

4. Then select Add to complete the Quick Add Walk-in.
Adding a Booking to the Wait List
1. Select a table from the Table Planning screen or select the Add Reservation icon.
2. Then select Wait List.
3. Then enter the cover count for this reservation
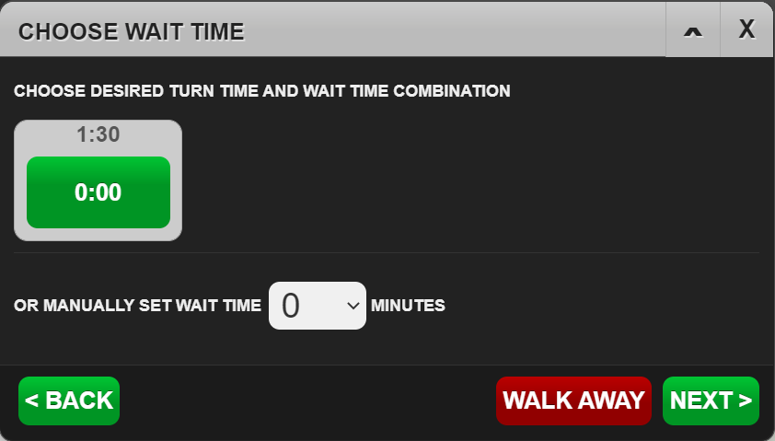
4. Next, we will be prompted to enter a turn time for this table.
5. Then enter the guest details and select Add to Waitlist.